Tuesday, April 30, 2013
SmartMAP Model SM 300 xxx Installation Instructions
What is the SmartMAP.?
The SmartMAP. model SS-300 replaces the check valve and restrictor assembly used by most Honda/Acura turbo and supercharger kits and prevents the engine computer (ECU) from shutting down the engine when the manifold pressure is above atmospheric (boost).
How does the SmartMAP. work?
The SmartMAP. connects inline with the stock (OEM) manifold absolute pressure (MAP) sensor and limits the MAP voltage that is applied to the ECU. The limit (clamp) voltage value is preset and can not be adjusted.
The stock Honda/Acura NSX MAP sensor has an output range of about 0.5V at high vacuum to about 2.7V at atmospheric pressure (wide open throttle for normally aspirated NSX’s). With a turbo or supercharger installed, the manifold pressure will increase above atmospheric, and the MAP sensor voltage will rise above 2.7V. At some voltage above 2.7V, the NSX ECU will assume that there is a problem with the sensor and shut off the engine, since under normal conditions (without the turbo/SC), the MAP output will never exceed about 2.7V. The SmartMAP model SM-300-275 prevents the ECU from shutting…
download here
Friday, April 26, 2013
2012 Honda Civic Sedan Owners Manual
 |
| Google Images |
Tuesday, April 23, 2013
2013 Ford Escape Owners Manual
Engine & Performance :
BASE ENGINE SIZE 2.5 L
CAM TYPE Double overhead cam (DOHC)
CYLINDERS Inline 4
VALVES 16
VALVE TIMING Variable
TORQUE 170 ft-lbs. @ 4500 rpm
HORSEPOWER 168 hp @ 6000 rpm
TURNING CIRCLE 37.0 ft.
Gets into something are available on the Target that also released this holiday season. Operation seriously isnt much different. Let the APA and search for the placement and let multiple car parking detectors get appropriate situation dimensions. Next, the screen down the middle of a rush will advise you in the event the site can be obtained.
 |
| Images By carsdirect.com |
Download 2013 Ford Escape Owners Manual PDF
Download 2013 Ford Escape Technical Specifications
2007 WK Jeep Grand Cherokee Owner Service manual
 Thank you for selecting a Jeep Grand Cherokee and
welcome to our worldwide family.
This is a specialized utility vehicle designed for both on-road
and off-road use. It can go places and perform tasks for
which conventional two-wheel drive vehicles were not
intended. However, on-road ride and handling will have a
different feel from what drivers experience with other
vehicles, so take time to become familiar with your vehicle.
Thank you for selecting a Jeep Grand Cherokee and
welcome to our worldwide family.
This is a specialized utility vehicle designed for both on-road
and off-road use. It can go places and perform tasks for
which conventional two-wheel drive vehicles were not
intended. However, on-road ride and handling will have a
different feel from what drivers experience with other
vehicles, so take time to become familiar with your vehicle.The two-wheel drive utility vehicle was designed for on-road use only. It is not intended for off-road driving or use in other severe conditions suited for a four-wheel drive vehicle. Before you start to drive this vehicle, read this manual. Be sure you are familiar with all vehicle controls, particu- larly those used for braking, steering and transmission and transfer case shifting. Learn how your vehicle handles on different road surfaces. thi PDF can be found at here
Wednesday, April 10, 2013
2007 Honda Accord Híbrido Manual sobre la navegación
El sistema de navegación está diseñado para proporcionar información de la ruta que le ayudarán a llegar a su destino. Sin embargo, esta guía de ruta a veces pueden entrar en conflicto con las condiciones de la carretera actual, tales como cierres de calles, construcción de carreteras, desvíos, y fuera de la fecha de los datos del mapa. Además, el propio sistema tiene ciertas limitaciones (ver página 97). Por lo tanto, debe verificar la información de la ruta de audio y video que proporciona el sistema mediante una cuidadosa observación de la calzada y señales, etc Si no está seguro, proceder con precaución. Siempre use su propio buen juicio, y obedecer las leyes de tráfico mientras se conduce.
Descarga: 2007 Honda Accord Híbrido Manual sobre la navegación
Sunday, April 7, 2013
2002 HONDA ODYSSEY EX L Manual
seats slide together to create an aisle on the right, or apart, to form a centre aisle. The seats are fairly light and the backs lock when folded to make them easy to manipulate. The grab handles in the seat backs facilitate access and provide a better grip when moving or removing the rear seats. Then there’s the Magic Seat, introduced in the preceding Odyssey. After removing the head restraints, it can be folded and flipped flat into a floor well. The seat has room for two adults, if
you want a bit of comfort. With the seat in place, there is still ample space for cargo. Any items you don’t want sliding around can be stowed in the floor well, or restrained using the hooks in the seatback. The rear hatch opens just high enough to clear a tall person’s head.
Download: 2002 HONDA ODYSSEY EX-L Manual
Friday, April 5, 2013
Acura Integra GSR VTEC Throttle Body INSTALLATION INSTRUCTIONS
Start the engine and check for loose connections or coolant/vacuum leaks, etc. 15. After the engine is warmed up, check the idle speed (refer to owners manual). 16. Double-check all fasteners, clamps, and electrical connections to ensure they are all secure.This Edelbrock part has received and Executive Order number (E.O. #) from the California Air Resource Board (C.A.R.B.) making it legal for street use on pollution-controlled motor vehicles in all 50 states. To assist you with emissions equipment certification, we have included a silver E.O. Number decal to help testing personnel verify that this part is a legal replacement part on the vehicle for which it is cataloged. The adhesive-backed decal should be affixed to your hood underside next to the existing emission and engine specification decal. Do not cover your original equipment specification decal with the Edelbrock E.O. Number decal.
Download: Acura Integra GSR VTEC Throttle Body INSTALLATION INSTRUCTIONS
Thursday, April 4, 2013
Audi A4 B5 DIY Belt Tensioner Pulley A4 1 8t
Is Mine Bad?
You can tell if your Belt Tensioner is going bad or is bad if you hear a whining sound when your start your car or your car is at idle...This signifies that your bearings are going bad inside the Belt Tensioner. Another way to tell is by taking the tension off the belt and spinning it by hand. If you hear any sound what so ever most likely its going bad?
What Tools do I Need?
You will need a 17mm wrench to release the tension
You will need one 13 mm wrench to break the bolts loose
You dont need but is helpful to have a 13mm gear wrench
You will also need a bungee cord (You will find out why later)
How long is this going to take me?
It took me 30 Mins from start to finish
How much money is this going to cost me?
85 from ecstuning.com...Its cheaper other places but you cant put a price on their customer service...So I always order from them.
How do I take it off?
1st pop the hood and let the engine cool down...Grab a beer or some food. Then Loosen the tension off the bolt using the 17 mm wrench and turning the wrench clockwise.
Then loose the three bolts that hold on the tensioner
Then remove the tensioner by pulling up through the top of the engine bay...(Its really not that hard)
You will now have the empty space as seen below
Now you can compare and make sure you have the right one
Now you can install the new one the same way you took the old one out...But wait this is where the bungee cord comes into play...Once you have the new one bolted in and all ready to go...Your going to say to your self o **** my hand is to fat to fit down there and grab the belt to place it back over the alternator so using one hand you move the tensioner clockwise and using the other hand you lower the bungee cord down and hook the belt then pull it up and you can now place the belt over the alternator still holding the wrench clockwise...Once the belt is on you can let go of the tensioner and your are now finished....
Wednesday, April 3, 2013
Audi A3 Euro amber tail lights and Blind spot mirrors DIY heated mirrors!
MIRRORS:
Installed in a matter of minutes.
1.Push the outside corner of the factory mirror into the mirror shell.
2.Pull out the mirror on the other side. just yank. There is only one snap that youre pulling on.
3.If you have heated mirrors, unplug the harnesses and remember which color goes to which. 4.Plug in your heated mirror connectors if you have the option.
5.Snap the new mirror into the port.
I know this sounds vague, but there is nothing to this.
For cars without heated mirrors, all you need are "heated mirrors" imagine that, and vag-com. see bottom of thread for details.
Total install time: 5 minutes.
------------------------------------------------------------------------------------
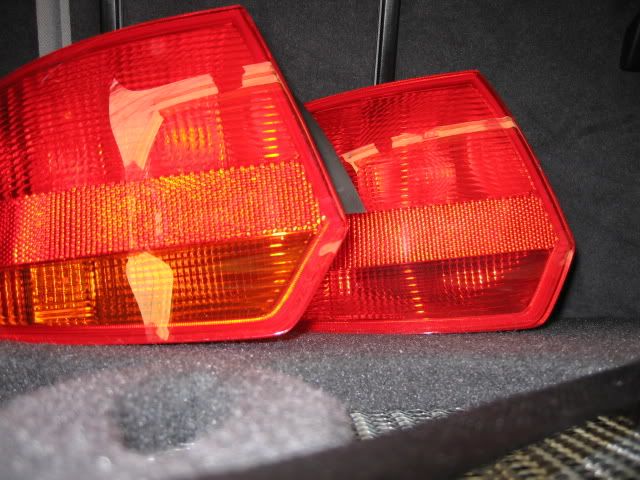
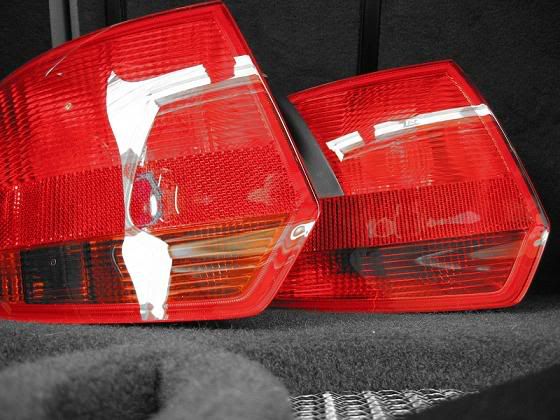
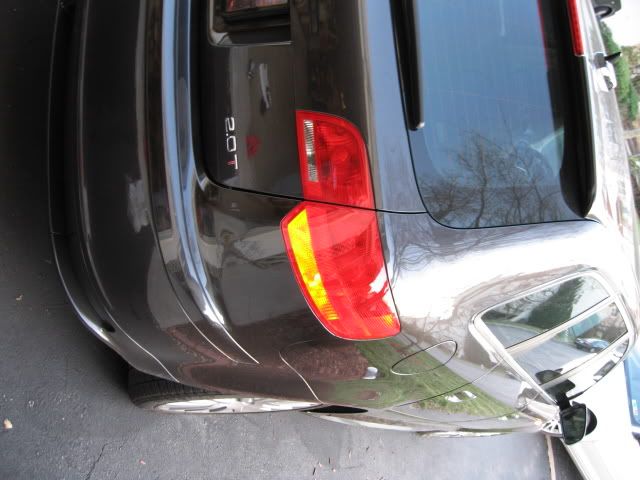
EURO TAILS:
They look sweet, you can tell theyre amber even when theyre not on.
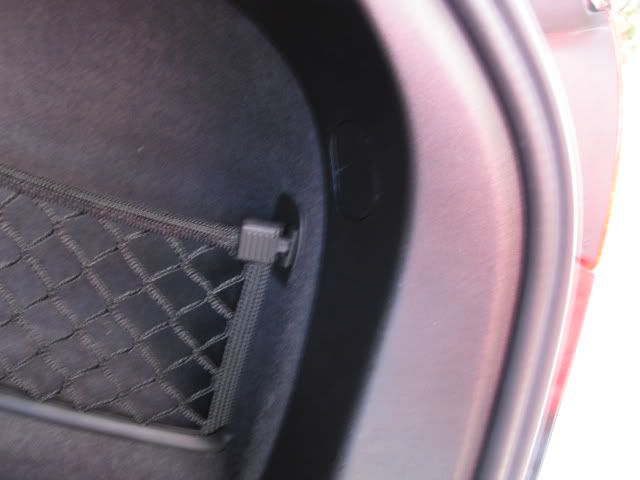
1.Find your two access doors on the inside off your trunk, one on either side. Flat head to remove. The access door on the P side is tied to the car, you wont loose it. The access door to the D side is not, so be careful.
2.Inside youll find a 13mm plastic bolt, with a small flat head inside. Use either or to remove, I used a flat head that was wide enough to only sneak in. This made it very tight Tip: this is important b/c you dont want to loose this bolt, if it falls down, youll be removing your spare tire to get it.
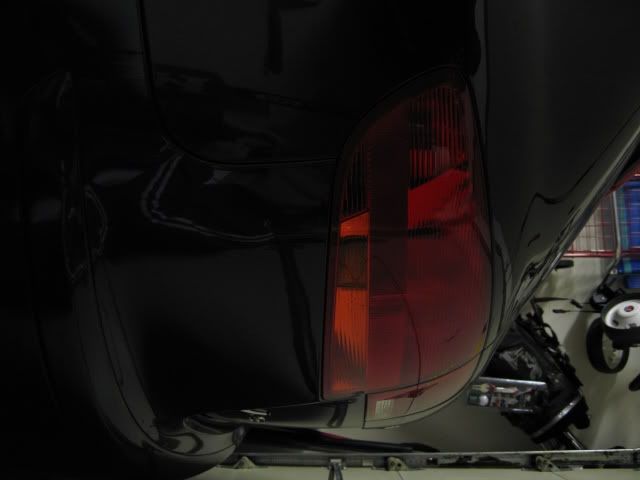
3.Once you get this long bolt untightened, pull it out with a steady hand.
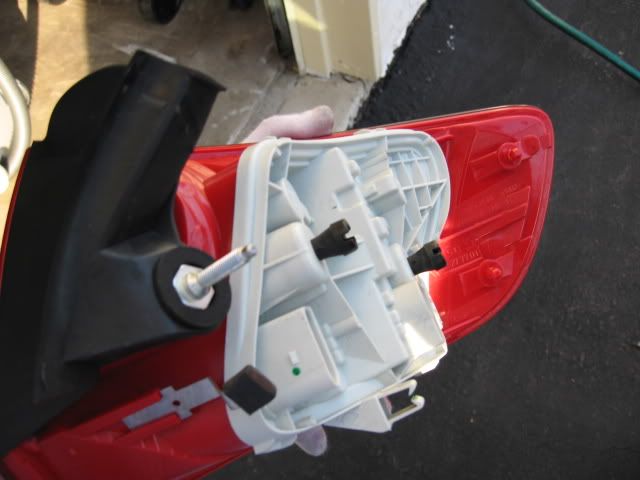
4.Now you can pull the taillight assembly from inside out, then pull the two tabs out (which are on the outside). I took a pic of the rear of the light, so you can see the 3 points. The long bolt, and 2 tabs.
5...Unplug, switch and reinstall your new light. Very easy.
Total Install Time: D side 5 minutes. P side 65 minutes...
I had to remove my custom enclosure to reach the access door! This was frustrating, but gave me a chance to shoot the enclosure which I never did.
Could the magnet be any larger on this sub? It must weigh 18 lbs.


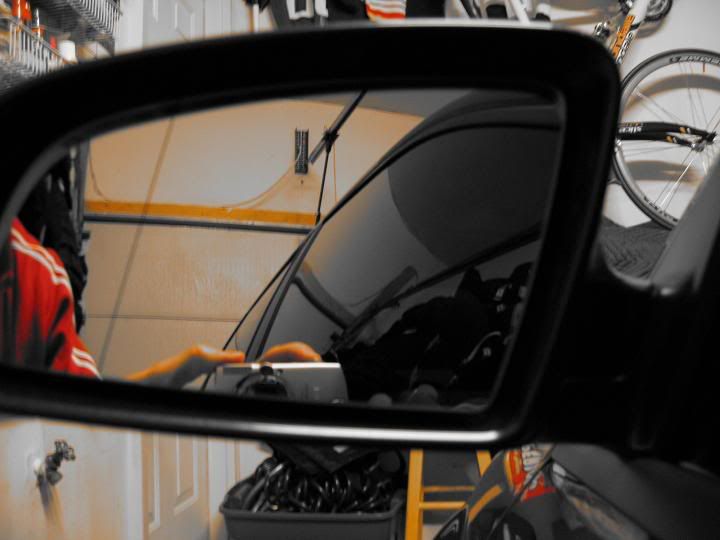
In this pic of the blind spot mirrors: I didnt do this on purpose but it shows how effective they are.
I was standing practically next to the mirror, with my arm out to take the pic. And you can see my red sweatshirt in the mirror.
I must admit, a lot of these installs are cake. headlamp/fog bulp upgrades, euro switch, euro tails, blind spot mirrors, etc, etc. Very easy stuff.
-------------------------
Thanks to DVAG member Bassbiker!
The coding is in the door control modules (42 - driver door, 52 - pass door)
It all depends on what your current coding is. I have the cold wx package and my coding is 1209 for both front doors.
Heres the coding chart from VAGCOM label file for the drivers door:
C00,Door Electronics Driver (J386) Coding
C01,+0000001 - Rear Lid Remote Unlock Button (E233)
C02,+0000002 - Ambient Mirror Illumination
C03,+0000004 - Mirror Turn Signals
C04,+0000008 - Interior Door Handle Illumination installed
C05,+0000016 - Automatic Run active
C06,+0000032 - Mirror Heater installed
C07,+0000064 - Door Exit/Warning Light installed
C08,+0000128 - 5-Door Chassis
C09,+0000256 - Seat Memory installed
C10,+0000512 - Right Hand Steering
C11,+0001024 - Safe-Motor not installed
C12,+0002048 - Pinch Protection inactive
Heres the full label file from VAGCOM website:http://www.ross-tech.com/vag-c...N.lbl
Id assume that those without the cold wx pack might have a code of 1177
If that is the case, you just add 32 for MIRROR HEATER INSTALLED
Now if your current code is 1209, youre configured to use the mirror heaters, but still not sure if the wiring is all in place within the door to actually supply power to it.
Page 98 of the owners manual states "Turn the rotary knob to 0"
"Depending on outside temperature and vehicle speed, the mirror surfaces are heated until the ignition is switched off"
No need to push forward on the knob
You can also turn on the heated mirrors by hitting the rear defroster button. Very handy for morning ice removal routine.
Tuesday, April 2, 2013
HYUNDAI TIBURON 2 7 Litre V6 Manual Coupe
include alloy wheels, air conditioning, disc brakes front and rear, dual front airbags, front seatbelt pretensioners, CD player, remote central locking with alarm, a trip computer, split folding rear seat and sporty-looking metal pedals. The V6 model adds 17 inch alloy wheels, cruise control, anti-lock brakes with electronic brake force distribution, leather trim, a rear spoiler and as already mentioned, six speeds in the manual.
DOwnload:HYUNDAI TIBURON 2.7 Litre V6 Manual Coupe
Monday, April 1, 2013
Audi TT DIY Changing the TTs Haldex Fluid and Filter
The Quattro TTs rear drive-train consists of two components; the Haldex Coupling, and the Rear Final Drive. The Haldex coupling is a multi-plate, wet clutch system that engages upon slip and transfers power to the rear final drive. The Haldex Coupling is a separate component from the Rear Final Drive, but is directly attached to it, and requires service every 20k miles (new fluid and filter).
Parts:
I purchased a new Haldex Filter and a fluid cartridge for this project.
Fluid - Part# G052175A1
Filter - Part# 02D525558A
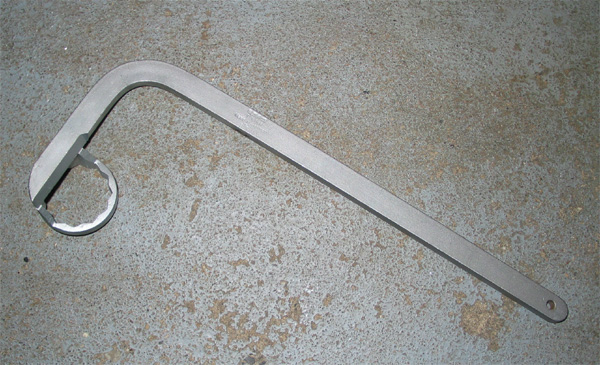
Tools:
Haldex Filter Wrench (#T10066) I found this at Impex for $45.
5mm hex socket - drain plug
Oil Drain Pan
NAPA Suction Gun or Standard Caulking Gun and a short piece of Ѕ" vinyl tubing
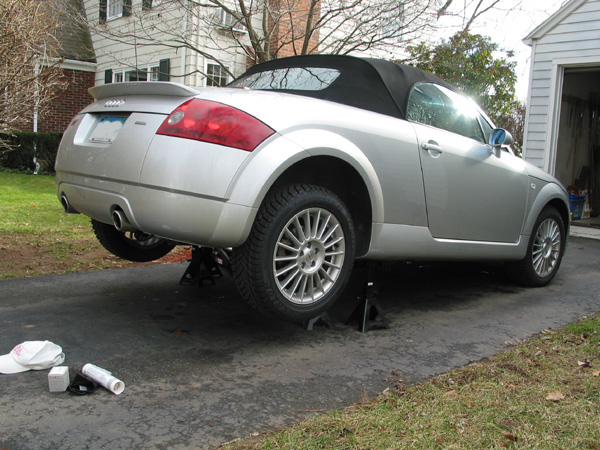
I jacked the back of the car up, and let the rear control arms rest on the top of the jackstands. Ramps would work for this, too, if you backed the car onto them. The Bentley indicates that the entire contents of the Haldex fluid cartridge are injected into the coupling, so I didnt need to make sure the car was level, as you would with a typical transmission fluid change.
Filter Change
To get the filter wrench onto the filter and be able to move the wrench enough to loosen the filter, you need to move a plastic guard that is attached to the bottom of the gas tank. I didnt remove this gaurd completely, I just spun off three flat, round discs that are pressed onto the screws that protrude through the guard - note the arrows in the pic. I was then able to hold the guard down enough to move the wrench.
Heres a pic of the guard moved out of the way - note the arrows in the pic - these point to the location of the retaining rings that you need to remove:

The filter came off easily - you have limited movement and space to work, but the wrench works well. Some fluid spilled out of the filter after it was completely removed.
Heres a close-up of the coupling without the filter installed:

Note what the old filter looks like - this is the metal cased filter that came on the car from the factory. If youve had this service done by your dealer, you should have a nylon filter - otherwise your dealer may have omitted the filter change as part of the service, not uncommon.

Getting the new filter on was easy. I made sure it was threaded correctly by hand, and then used the wrench to tighten it (Not too much torque - its made of nylon!).
Heres a pic of the filter wrench in place:

Drain and Refill Coupling
Once the filter was changed, I opened the drain plug using a 5mm hex socket, and let the old fluid drain out. Much less fluid came out than what was in the replacement cartridge, so I was glad to be replacing it.
Note the arrow in the pic pointing to the plug:

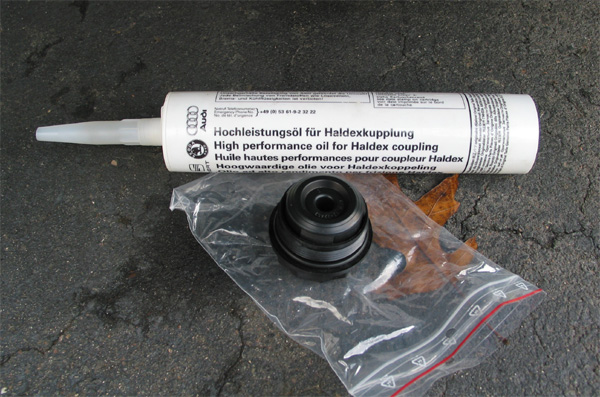
You have a couple of options for filling the coupling back up - I chose to use a NAPA suction gun that I had instead of putting the cartridge into a caulking gun. This cartridge will work just fine, by the way, with a caulking gun - you just need to use a piece of vinyl hose at the end of the cartridge so you can angle the cartridges plastic injection tip into the drain hole. If you dont do this, the gun and cartridge will probably be longer than the space between the driveway and the bottom of the car.
Heres what I used:

I injected the entire contents into the coupling, and quickly pulled the gun out and replaced the plug - tightened to 15Nm (according to the Bentley). I lost a very minimal amount of fluid doing this. I cleaned up the bottom of the coupling with a rag - lowered the car, and took it for a drive.
What I would do differently in hindsight:
The Bentley says to apply a small amount of fluid onto the new filters rubber seal - just like you would with an oil filter. I forgot to do this.